I sometimes wonder why we all chase vehicle-wrap jobs, when we know there are certainly more profitable, less stressful jobs to be had.
Take banners, for example: You need to know the material selection, the size, and the finishing details, such as pole pockets or grommets – but that’s pretty much all you need to know. Wraps, on the other hand, are extremely detail-oriented. We all know that the more specifications a particular job requires, the greater the possibility for errors or difficulties. Unlike a simple banner job, there are a lot of ways to mess up and end up re-doing a vehicle wrap, and the attention to this level of detail is paramount.
One way to be sure you get an unhappy customer or a reprint order is to accidentally build in what we at bluemedia call a “design collision.” We have reserved this term for any occasion where the proof and reality collide. In other words, the “produced vinyl” in hand cannot accomplish what is represented in the two-dimensional proof. At best, these instances force the install team to stop their work and get clarification. At worst, they can cause a complete re-print of some – or even all – of the wrap.
Becoming aware that design collisions exist, then learning how to look for and eventually avoid them in the first place, are skills that can make you more profitable in the long run. Let's take a look at a few examples to ensure you have the greatest chance of skipping this avoidable issue in the future.
Taking a few extra steps
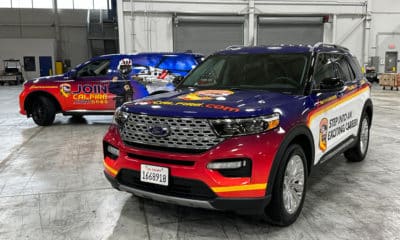
The most common design collisions involve what we call a 360-degree wrap. This is a wrap design that calls for one or more elements to line up around multiple sides or the entire vehicle. For instance, imagine a van with a two-inch red stripe that begins on the side, up by the headlight, and continues around the back of the van, ending up on the front of the other side, by that headlight. This, in itself, does not seem too difficult – and it isn't difficult provided you take a few extra steps.
First, be sure you understand that this two-inch line element “locks” both sides and the rear panels together. Basically, this means every single panel must be installed at the exact same height in order for that stripe to travel around the vehicle without interruption. A detailed template and/or survey are key here.
Advertisement
You will need to build in some insurance in other areas, too. By this, I mean don't place a phone number too close to a wheel well, and give yourself an extra inch or two when deciding where to place a small logo. If you build other elements too close to edges or obstacles, you will not be able to adjust the panel placement due to that red stripe, and that can mean a logo or other element collides with an obstruction – presto, a design collision.
This can result in a re-print, because your customer most likely approved a proof that contained the stripe around the vehicle, and the entire logo in the right spot, and that is what they want. To combat this potential pitfall, be sure to build in some extra “blank” space between vital design elements and obstructions when you have a “locking” element going around the whole vehicle. Another way to combat this danger is to produce the stripe as a second layer: Install the wrap, then hand place the stripe by itself, right where you want it.
View from the bumper
Another common area in which design collisions frequently occur is on the superwide rear fenders of any dually truck. If you have ever installed a wrap on one of these heavy-duty trucks, you know that just getting the vinyl installed is challenging enough, let alone trying to line up graphic-design elements in this area.
The problem is, these fenders have a top, a face, and sides, and then all four of these surfaces meet the standard bed side. This shape forces you to make a choice: Should this area line up to be readable from the side view or the top view? It’s almost impossible to do both. So what to do?
Recognizing that this area should be addressed early on is the first step. Explain the challenge and the possible solutions to your customer up front. We recommend to our customers that they only use this area as background or non-vital display. Since the vinyl must be stretched and pulled quite a bit, the image alignment is never guaranteed here. I also recommend that you produce a separate panel to be used exclusively for the top surface of any dually fender.
The corners of any vehicle can present a special type of challenge, too. To make this point, let's think about the corner of the vehicle where the sides meet the rear. For this example, let’s use a Ford Crown Victoria. Most installers will tell you that the cleanest way to install a full wrap on this vehicle is to pull the side panel around back and trim the vertical line at the trunk lid. This also implies that the same will happen where we pull the vinyl up over the side and trim along the horizontal line of the trunk. Seems easy enough. “So where is the problem?” you might ask. The problem occurs when the designer shows a rear view that does not take into account that some of the side vinyl will be visible from the rear, and vice versa.
Advertisement
This is true on modern bumpers, as well, where they cover the rear and as much as a foot or more on to both sides. If the side of the vehicle is to be blue and the rear is to be white, you must strategically decide early on how to handle the bumper-wrap design. Where does the blue stop? Where does the white begin? Keep these areas in mind when producing proofs, so you can illustrate the options and recommendations to your client. This is much better than a surprise during the install.
Three easy steps
These design collisions are easy to spot if you’re looking for them, so challenge your sales and design staff to become experts at avoiding these collisions. Here are a few tips:
• Don't send proofs to clients that are impossible to re-create in reality.
• Walk around the vehicle with the installer and think about where each panel will start and stop.
• If you plan out how the vinyl will land, it should be apparent if you could be in for a design collision.
Then, be professional and clear when you communicate the options to the client. The best option, of course, is to design away from these problems from the beginning. It will avoid confusion and dissatisfaction in the long run, and goes a long way to remind them that you are the vehicle-wrap expert.


 Best of Wide Format2 months ago
 Best of Wide Format2 months ago
 Blue Print3 weeks ago
 Best of Wide Format2 months ago
 Best of Wide Format2 months ago
 Best of Wide Format2 months ago
 Best of Wide Format2 months ago
 Best of Wide Format2 months ago


