Special Reports + Analysis
To SEG or Not to SEG
The answer is a resounding yes. Learn how to be successful with this easy-to-ship, low-cost, and sustainable application.

WHAT DOES THE ACRONYM SEG stand for anyway? While Wikipedia defines it as the “Society of Exploration Geophysicists,” in our world of wide-format digital print, it means “Silicon Edge Graphics.”
The display framing technology has been around for years. Decades ago, multiple players in Europe, including my former company, Corporate Solutions in the Netherlands, were searching for an alternative to the then-common, heavily weighted tarpaulin frames. I made my first SEG frame more than 20 years ago, so why is it only now that we’ve really started to see them in the Americas?
Let’s take a look at SEG’s history to understand the importance of its development. When the first print service providers started working with textiles, it was a very special proposition. Most PSPs were printing their posters and banners with solvent, water-based pigment or this new ink called UV. With some of these inks, the color wasn’t popping on the textiles, which was a problem. It looked great on banners and posters, but not on fabric. The reason for this was simple: the inks would seep into the fabrics, creating a dull effect. Drying the solvent and/or water-based inks on fabrics was an accomplishment itself. The only technology left that worked was UV ink, as it would dry directly on the fabric after curing. Back then, UV was not very flexible, so ink cracking on the fabric was just something you had to live with. Adoption of this process was slow because the benefit of using fabrics just wasn’t substantial enough. UV inks looked great on canvas and other pre-mounted media, but not on the flexible fabrics that were put in frames. Dye sublimation technology was just starting to become digital, and there was still a lot of experimenting going on.
At the end of the ’90s, cardboard, paper, banner, and vinyl were the dominant carriers for most of the retail outlets. Why use a new technology, new equipment, and new workflow? It seemed as though it would only complicate things. In the US, the volumes of retail prints were a lot larger than their European counterparts. Europe has 24 languages, a plethora of different cultures, and more than 40 countries to supply. Local PSPs creating prints for their country could work faster with smaller orders in textiles. Dye sublimation looked nice, but you needed new equipment and knowledge to be successful. You had to know how to preshrink fabrics, print on paper, and transfer them to the fabric. A lot of investment and work for a new market, right?
Those weren’t the only problems. The placement of these vinyl murals and banners was very laborious and expensive. The staff of most stores had no clue how to mount such a big piece of sticky plastic. Even if they figured it out, bubbles, scratches, and deformations were something you had to accept. Banners were easier to work with, but how do you hang a banner straight? Walk into any shopping mall and you’ll see what I mean. All those rings and tunnels don’t look very nice in a store, not to mention the reflections of the store lighting system. It was always a hassle to prevent wrinkles on the paper posters, and placing them correctly was a challenge. Retailers ended up paying installers to come in and place the new images, which was a huge cost factor.
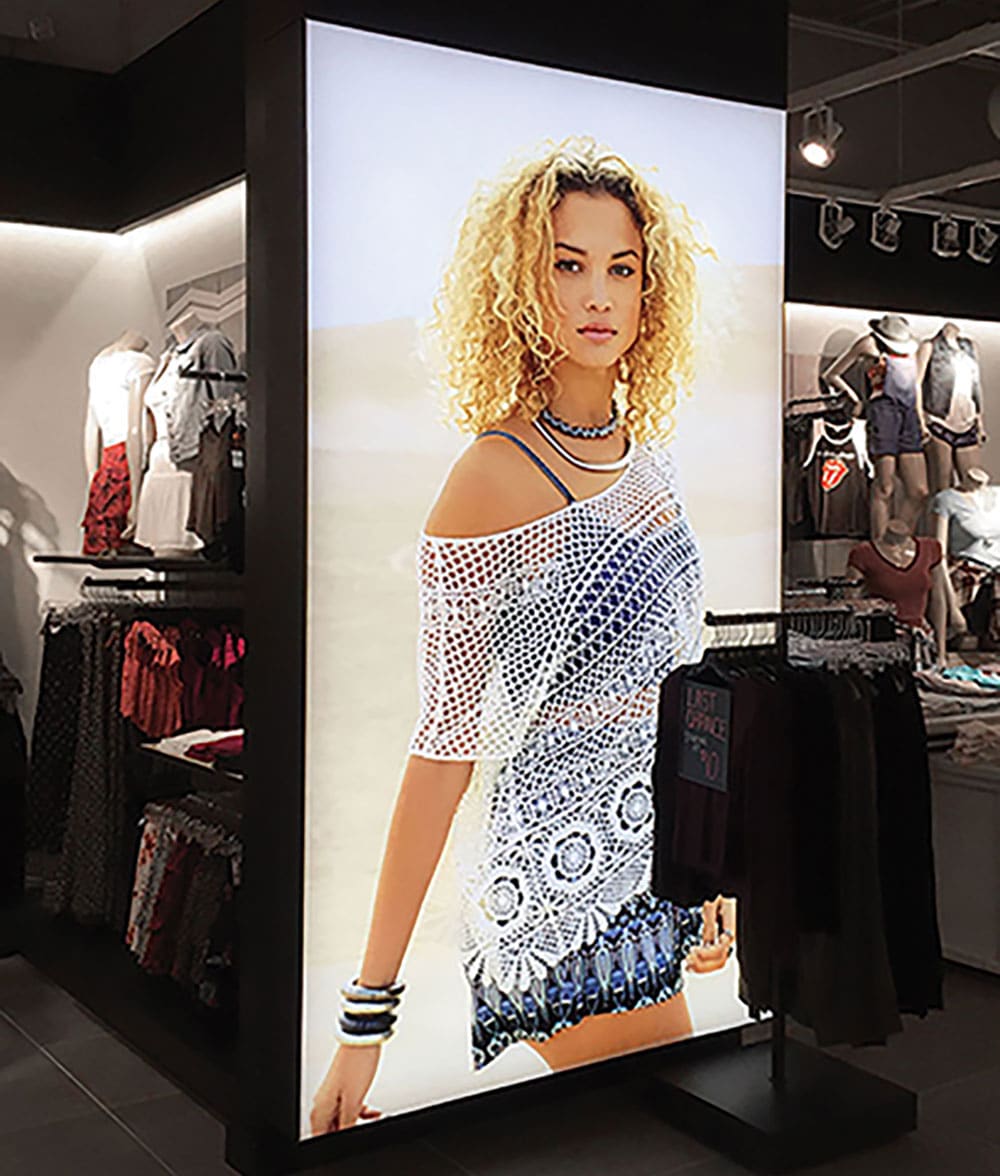
The retail marketing departments wanted to know how they could get their message delivered and mounted in the stores in a professional, yet easy, way and at a low cost. This is where fabrics came in. They’re lightweight and easy to transport, as large tubes and containers aren’t needed to carry the textiles. Sending the fabric in a small box via UPS or FedEx typically does the trick at a low price point with consistent delivery times. Plus, it’s simple for local store staff to mount the frames themselves. Using this strategy, the installation cost decreased dramatically. Sending mounting/installation teams around the US to customers is now a thing of the past. The beauty of it all is the amazing amount of color coming off the images. There’s no glare like there is with tarpaulin. The matte fabric finish is so nice it could be used at any location in a store without the ugly lighting issues. The local TV stations even understood this benefit; TV backdrops for shows like X-Factor and The Voice are all printed textiles.
Back to the big retail companies in Europe. H&M and Mexx Clothing were the first ones to start using this new technology in their stores. It really was a joint venture at the time; the brands invested in the aluminum frames in the stores and the PSPs could deliver the content on textiles with a silicone edge for mounting. A win-win situation. In 2004, I was already producing 2400 banners a week for Mexx to be distributed around Europe.
So, how does it work? It’s easier than you might think. But, if you want to do it right, you need to own the whole workflow, from the aluminum extrusion lengths to the sewing of the silicon edge on the fabric. In the early days, you really needed to do all of this in-house. Today, there are many solutions that will make your life a lot easier.
One Step at a Time
The coloration of the fabric can be done with dye sublimation in two ways: direct printing on the fabric or via transfer paper. Today, most soft signage SEG fabrics are printed directly on the fabric with dye sublimation inks. This means the fabric has to be pre-treated so the ink will not run/bleed at the time of printing. If you want to use uncoated fabrics, you have to use transfer papers. Remember, you can use only polyester fabrics (minimum 60 percent polyester) with sublimation inks. The fabrics have a natural stretch of one to 10 percent. You don’t want this stretch, but you get it for free. The stretch comes from the knitting machines that make the fabrics. Check with your local fabric supplier to see what the options are (backlit, frontlit, flame retardant, glossy, stretchy, etc.); they’ll help you find the perfect fabric for your frame.
AdvertisementAfter the print is made you need to calender it. You’ll need to go through a heat press at 385 degrees for about 30 to 45 seconds. This is needed to fixate the inks to the fabric. The disadvantage of heating is shrinkage. It can shrink up to five percent, which is a lot. Now we have the next dilemma: if it shrinks, it will not fit in the frame. The trick is to know why and how the shrink is happening. Fabrics shrink differently in the running side of the roll and the width side. If there’s six percent shrink in the running length and two percent in the width, then you just add this to the original size. Say it’s 106 percent by 102 percent. Even if the print looks deformed, it will end up ok after the heat press. There are many small tricks for you to ease the process, like if you get a stretchable fabric, you can put a bit more tension on the fabric when mounting it onto the frame. The best way to test the stretch is to make a three by three-foot box, adjust the line, and measure the box after it is pressed.
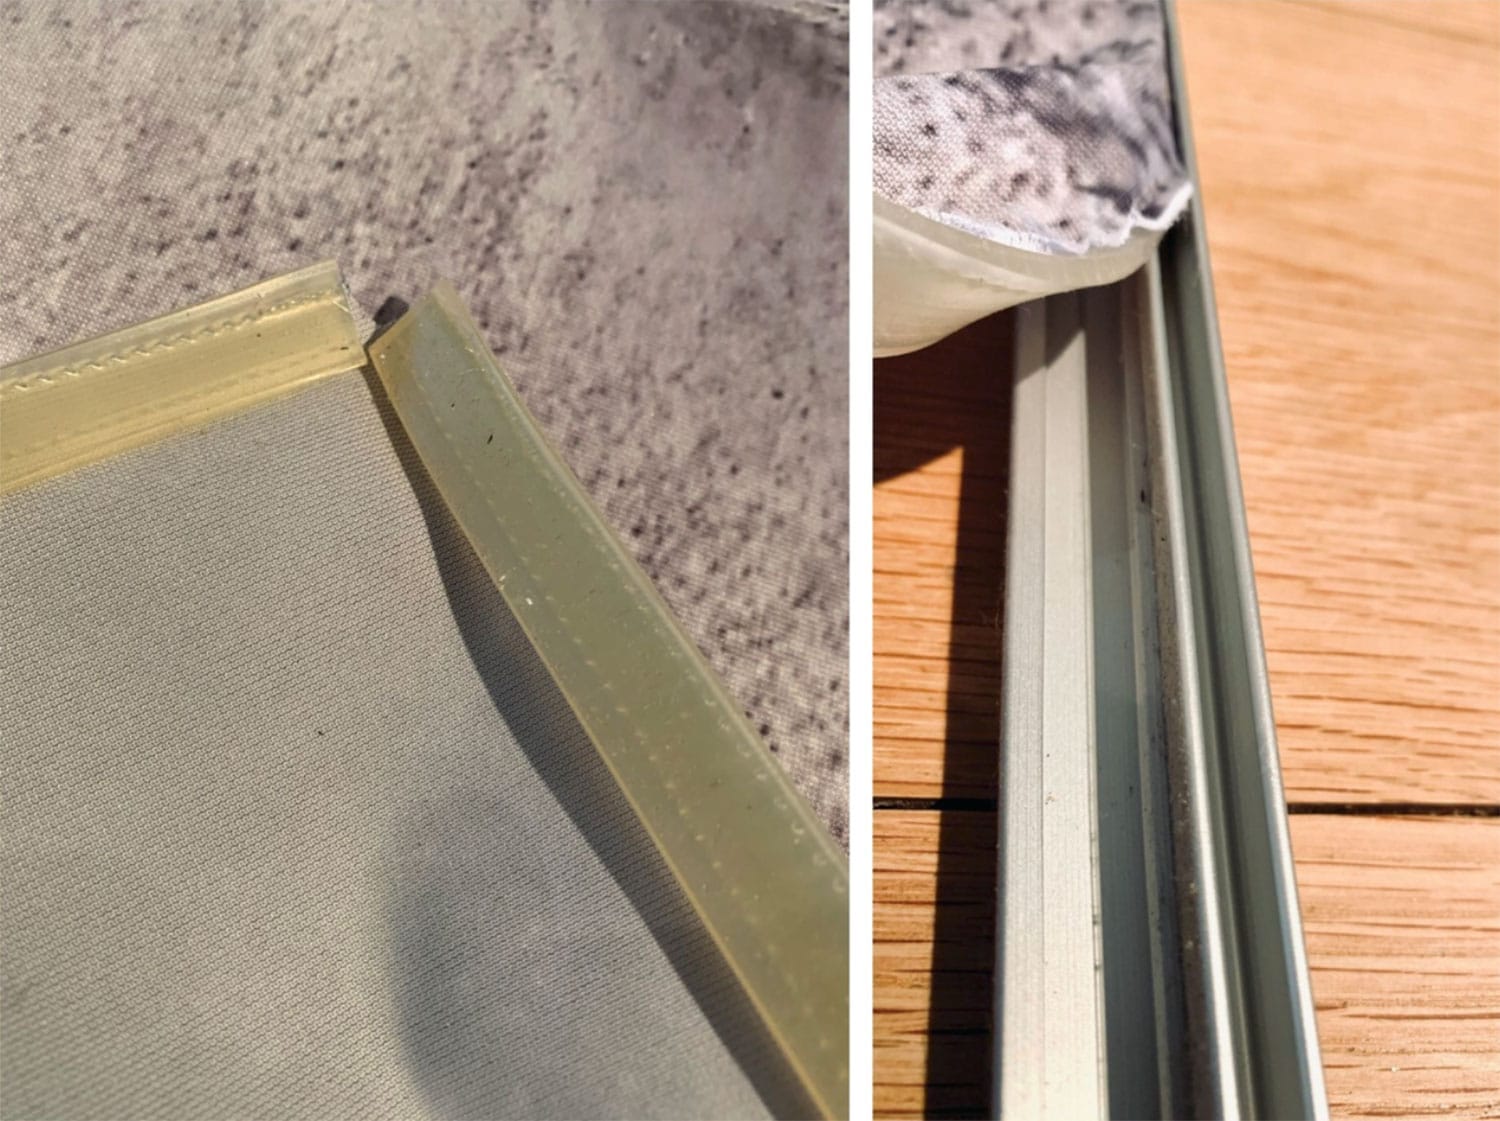
Now your print is finished and the silicon edge needs to be mounted on the fabric. You’ll need 13 to 15 millimeters of extra material around the image to mount the silicon edge. This edge will disappear into the cavity of the aluminum extrusion once mounted.
There are a few options:
- Sewing by hand with a professional machine with one or two needles
- Using a fully automatic sewing machine with a conveyer belt
- Easy peel-and-stick adhesive Keder tape
- A Keder you can hammer into place
All of these can be found in silicone, PVC, and even bio plastics.
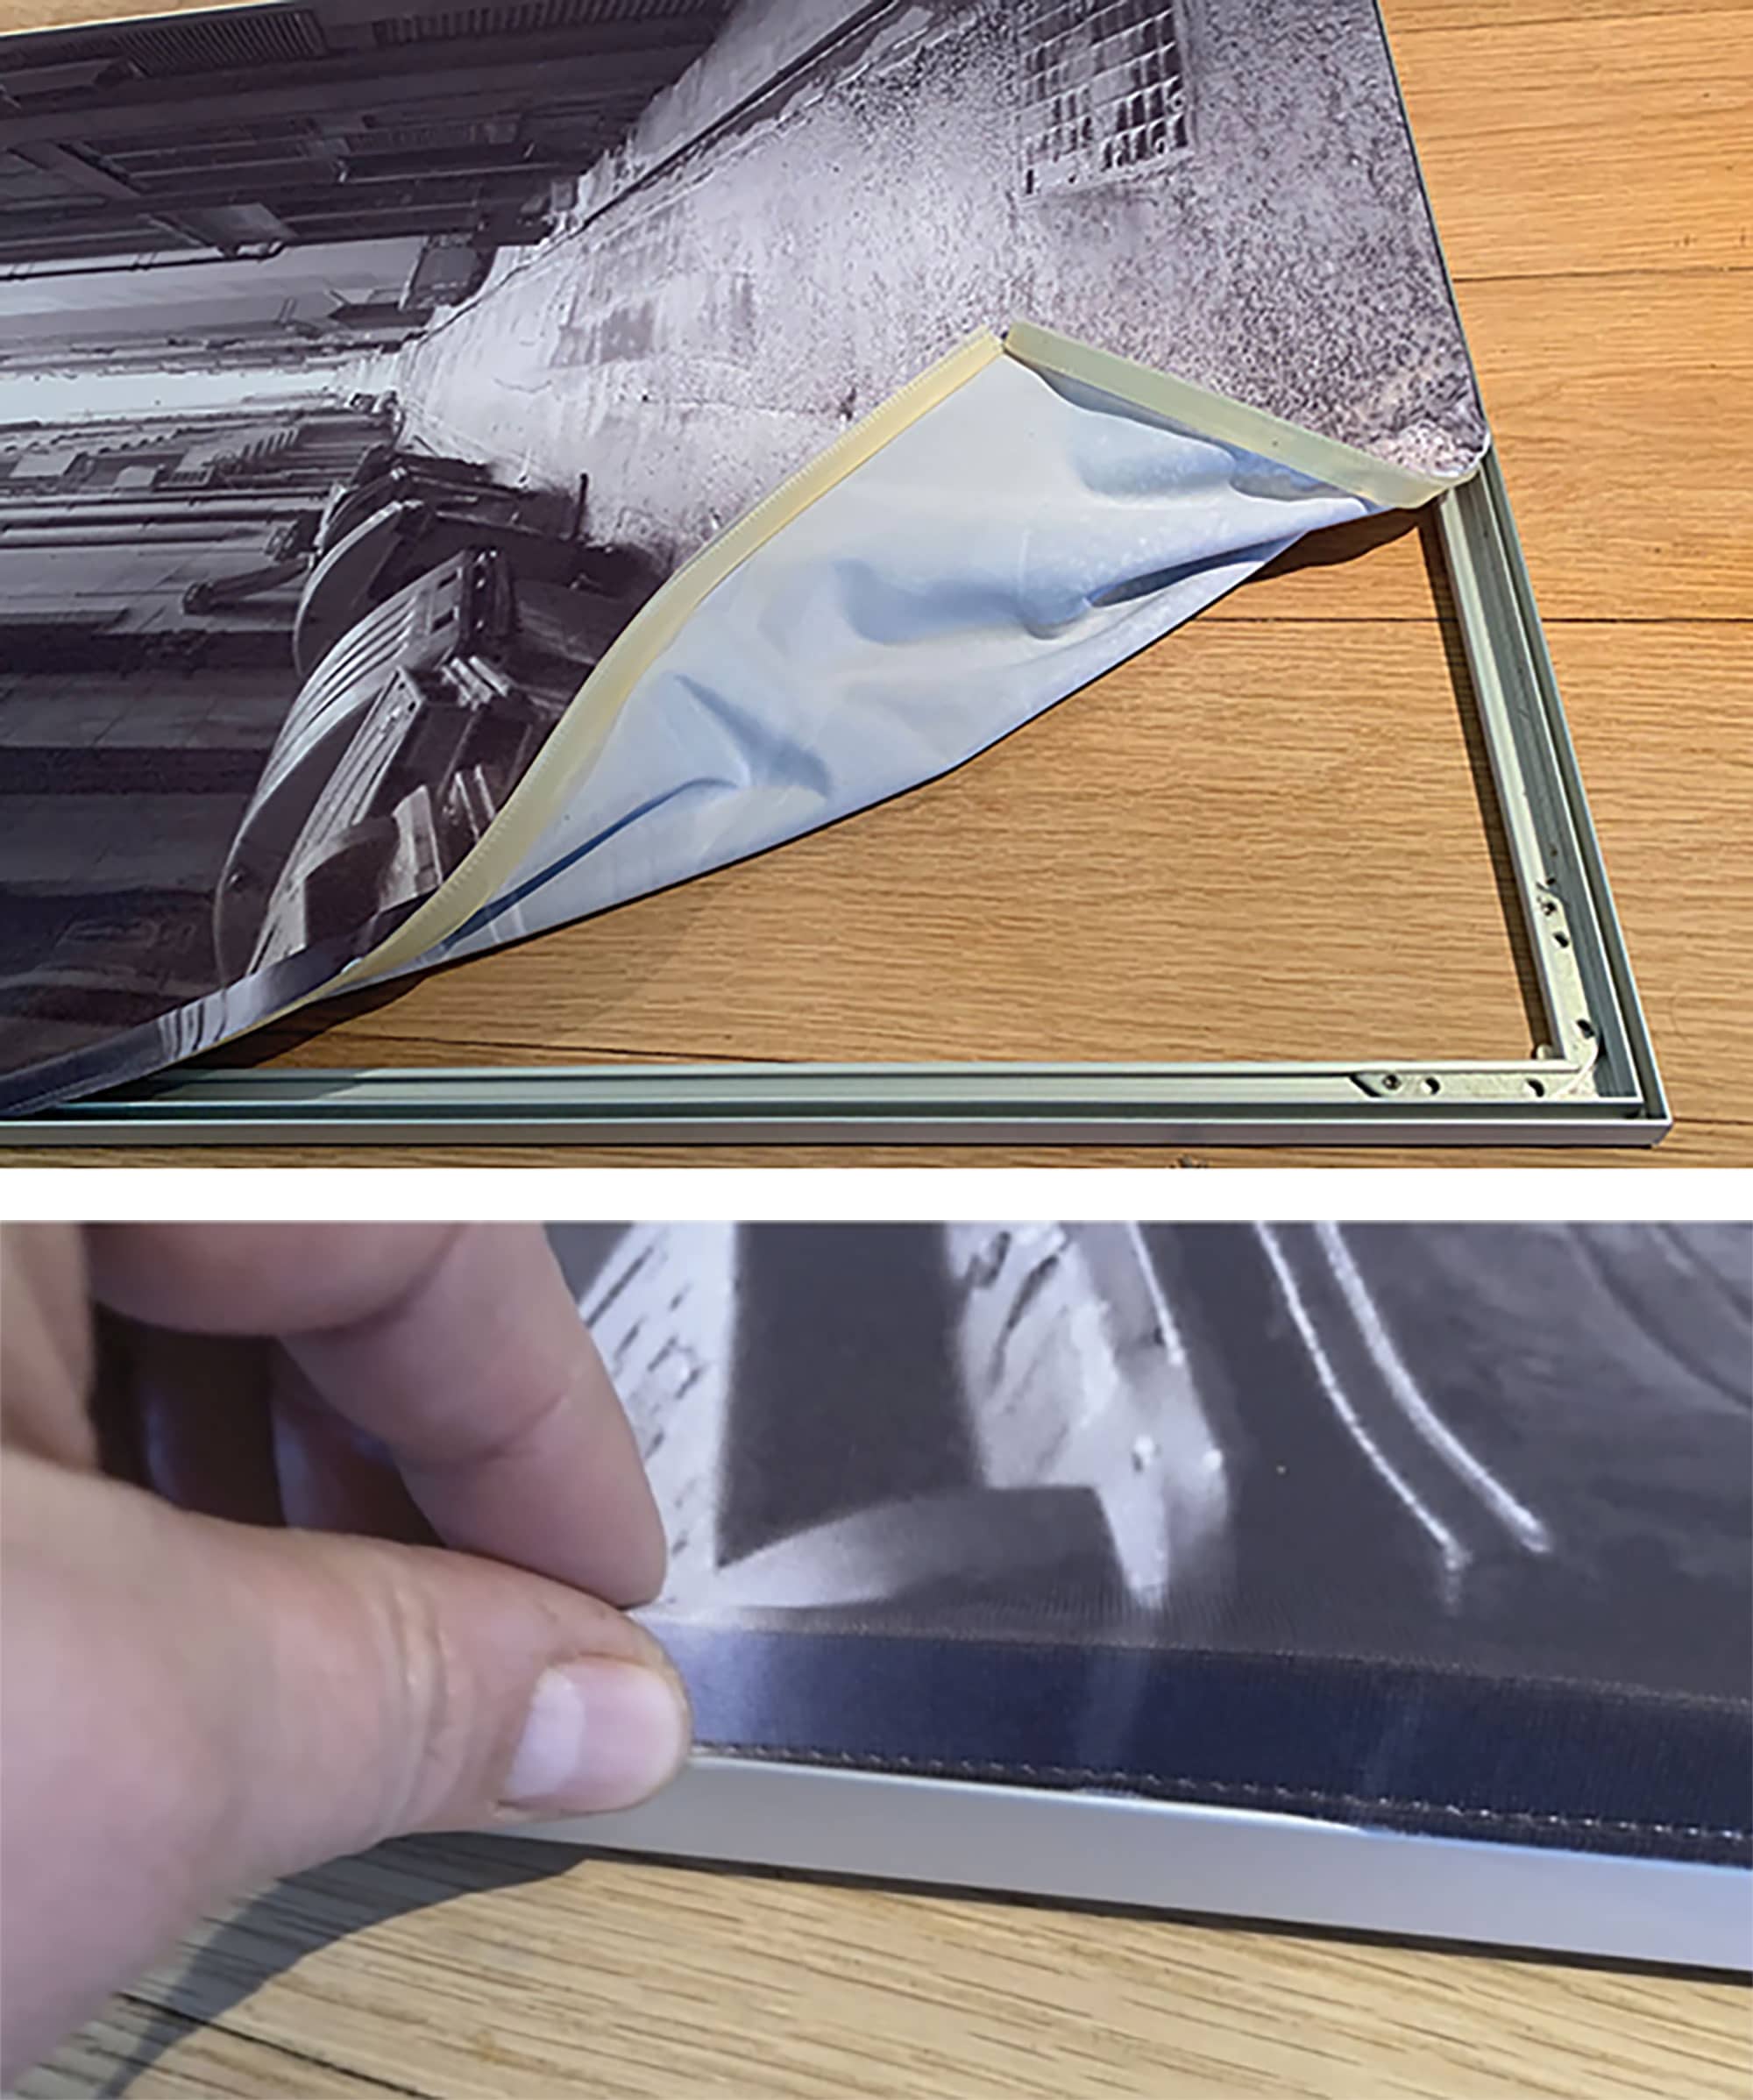
Once the Keder edge is mounted on the fabric, it’s time to mount it into the cavity of the aluminum extrusion. These extrusions can be found at all the large sign and display hardware vendors, or you can get them custom sized.
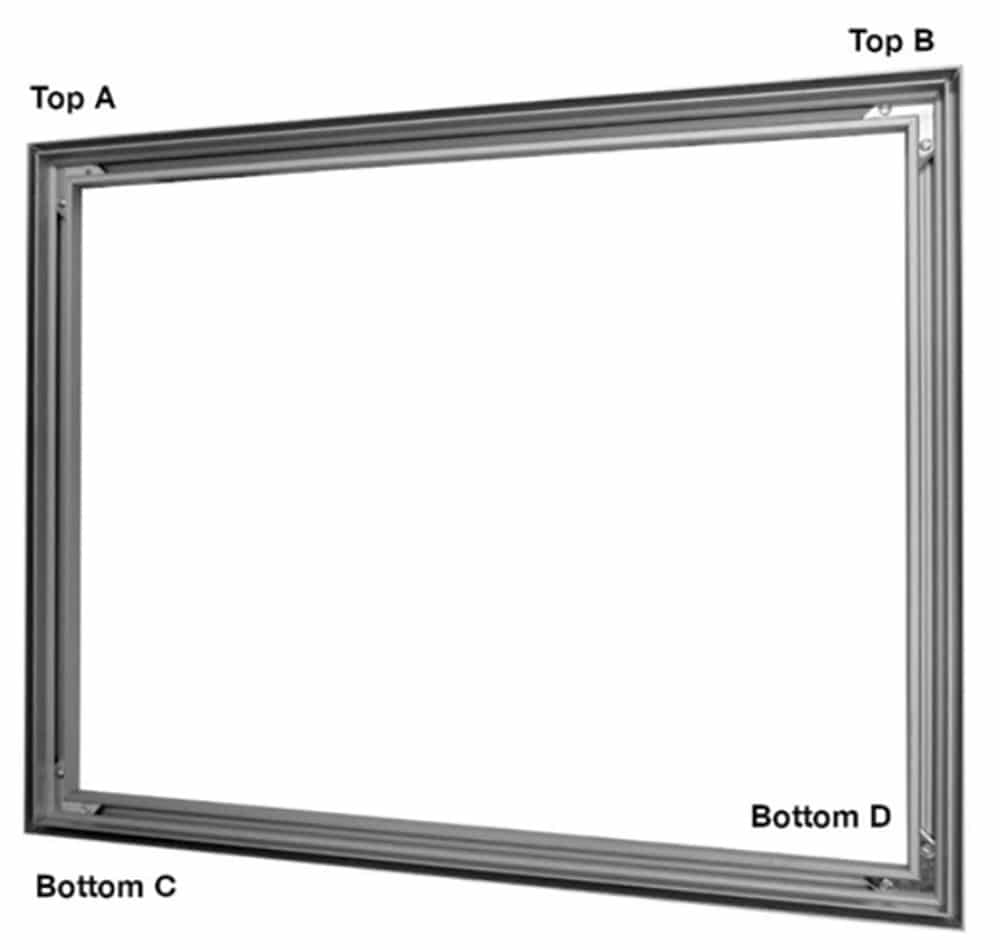
AdvertisementThe most important tip here is how to mount the image correctly. You need to start on the correct side of the frame. If the frame is labeled Top A&B and Bottom C&D for each corner, then you would start mounting about four to 10 inches on side Top A to the right and make sure there’s no tension. Then move over to the Top B side and do the same four to 10 inches to the left. If the frame is really large, expand your reach to approximately 25 percent of the total length. Now do the same for the Top A and Top B going down to C and D corners. Now apply the same principle to the bottom, starting with Bottom C and then Bottom D corner.
After this is done, you can slowly push the silicon edge from both sides to the center and finish it off with the last little part in the middle. If you didn’t put tension on the fabric, it will look great. If you have wrinkles, just pull them out and try again. Remember, you never end in the corner but always at the longest side of your frame. Complicated? You’ll get the feel for it soon. And if it goes wrong the first time, don’t panic – just try again. If you only occasionally make frames, there’s a new solution in the market with the silicon grip already in the frame. The only thing you need to do is push the fabric into the cavity with a credit card or special tool. Super easy for that one-off frame.
When I started creating SEG displays, we had only two frame types: thick or thin. Now, we have so many different types it’s impossible to list them all. The options range from single to double sided, curved, one and two-sided LED lightboxes, cubes, and so many more.
Apply It
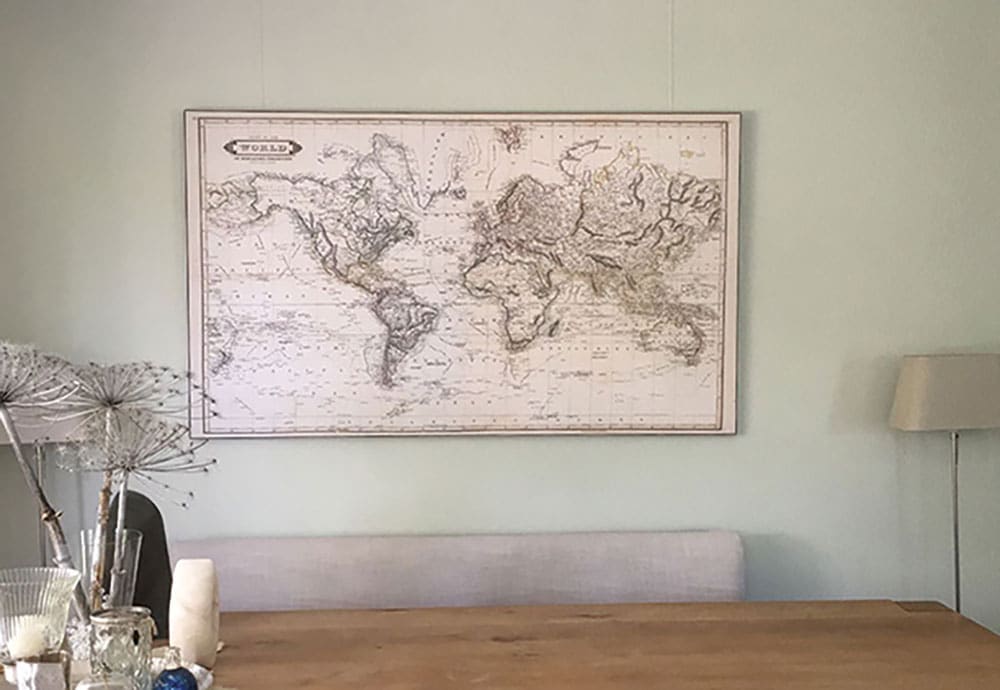
As frames became more evolved, so did the application arena. Today, frames are no longer only used in retail, but in exhibition graphics, home decoration, and sporting events. The textile SEG frame is here to stay. I even have some frames in my house.
The biggest benefit for any PSP entering the market is you already have the sales contacts. For example, office supply stores are interested in lowering their cost structure all the time; supermarkets like to make special areas for fresh food. Create a frame and structure that will work for them to create a long-lasting relationship with you.
Textiles are popular among PSPs because they’re recyclable and easy to transport; production cost is now much lower, creating a greater ROI. With all the tools you have at your disposal – like the automated sewing machine – you can become a pro in no time. Most corporations and consumers have sustainability ranked high on their agendas; textile SEG frames contribute to this goal. Digitally printed textiles paired with SEG frames will not only be a product you’ll love to make, but one you’ll love to sell.
Printvinyl Scored Print Media
New Printvinyl Scored wide-format print media features an easy-to-remove scored liner for creating decals, product stickers, packaging labels, and more. The precision-scored liner, with a 1.25” spacing on a 60” roll, guarantees a seamless and hassle-free removal process.


Check Out the Great Info in the July/August Issue

National Workaholics Day, Interns Day, and More July/August Dates for Print Pros

Kill an Obsolete Project, Survey Competitor’s Websites, and More To-Dos for July/August


Bulletins
Get the most important news and business ideas from Big Picture magazine’s news bulletin.


-

 VEHICLE WRAPS + GRAPHICS3 weeks ago
As the Wrap Market Surges, Technology Keeps Improving
-
 Press Releases3 weeks ago
MUTOH Wins 2024 EDP Award “Direct to Shape Printer” for Its XpertJet 1462UF
-

 Case Studies3 weeks ago
At This Pennsylvania Printer, Color Consistency is King
-

 Case Studies1 week ago
Former Frito Lay Delivery Van Becomes an Eye-Catching Catering Vehicle
-

 Benchmarks3 weeks ago
3 Food Truck Wraps Where Skilled Designers Overcame Tough Technical Challenges
-

 Press Releases2 months ago
Avery Dennison Sponsors 2024 Design-a-Bus-Wrap Student Art Contest
-

 Press Releases3 weeks ago
PRINTING United Alliance Announces 2024 Pinnacle Award Winners
-

 Press Releases2 months ago
Konica Minolta’s AccurioJet KM-1e Shines at 2024 In-Print Awards