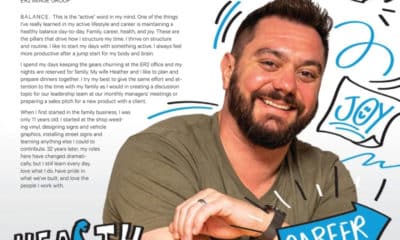
If you have been producing vehicle wraps for a while, it’s likely you can recall a job or two in which the designer screwed something up: The hood didn’t fit. The logo ran into the door handle. The phone number was too big on the tailgate.
Do any of these scenarios sound familiar? If so, you know how frustrating this can be for the client, the installers, and the sales staff. These types of errors are expensive and they can give your client the impression that your shop doesn’t know what it’s doing.
What happens after the re-work? Usually a discussion occurs with the designer about what he or she “did wrong.” I would suggest, however, that many of these re-work issues – or possibly all of them – are not the designer’s fault at all. In fact, they might be your fault.
Here at bluemedia, we use a process called “make it your fault.” We seek out what we all could have done better to reduce the probability that any similar errors will occur in the future. Along the way, we inevitably find some interesting rocks previously unturned.
Megapixels and inches
In order for a wrap to get successfully installed, it must first be correctly printed. And, of course, in order for that to happen, it must be correctly designed.
Before all that can happen, though, various strategies, specifications, and measurements have to go right as well – some more obvious than others. I’d like to challenge you to find a few of the not-so-obvious factors that are required to get a set of great production files delivered to the print department. Then, take a hard look at your shop’s systems and policies so that you can increase the probability for success on the first try.
Advertisement
In my opinion, this process begins in the sales department. The first factors to define are year, make, and model of the vehicle to be wrapped. For this example, let’s use a simple vehicle to identify: a Nissan NCV.
The client informs us that they would like us to wrap a 2012 Nissan NCV. Some shops think they have everything they need at this point, but a more experienced shop knows this is just the beginning. We next need to know which body style. In this case, we’re lucky because there are really only two: short or tall. The client informs us it is the short version.
Next, we need to know if there are side windows or not. The client informs us there are indeed side windows. Using the Nissan website, we confirm that there are rear windows as well (all NCVs with side windows have rear windows). From our experience with this particular vehicle, we begin to get the picture that this is an NCV 2 – a passenger van rather than a cargo van. This makes sense – this client is a local hotel that intends to use the vehicle for airport transfers for hotel guests. (This might also mean that we won’t be doing any perforated window vinyl, since some clients don’t want passengers sitting so close to window perf – which can result in a blurred view.) The NCV 2 has rows of seating instead of a cargo bay. The last question we need answered is, “Does this vehicle have side body moldings?” The client answers, “I think so.”
With this information in hand, we can begin to assess our likelihood for success. I’m confident we now know which vehicle we’re working with. The story checks out and that vehicle makes sense for its intended use. Remember, the client said he “thinks” there is body molding, but we need to find out for sure.
To help increase our chance for accuracy, we always get photos from all four vehicle sides – every time and for every vehicle-wrap order. If we have previously wrapped this exact vehicle type, we don’t require any measurements. If, however, we have not previously wrapped this vehicle type, we ask the client to schedule a 20-minute survey at our shop, where we will precisely measure the vehicle and take the necessary photos.
The photos are used for two very specific reasons: First, they serve as a visual overlay (in Illustrator or Photoshop), ensuring that the template we’re working on is the same shape as the vehicle. This is especially key when designing commercial vans, to ensure the template you have matches the wheelbase (measurements from the center of the front wheel to the center of the rear wheel). Or, when working on Sprinters, to ensure you also have the correct height option (there are several height options for that particular vehicle).
Advertisement
The second reason for the photos is so you can perform a visual inspection and look for anything that will dictate the coverage area as well as any obstructions to avoid. If you’re wrapping a Chevy Avalanche, for example, you can inspect the photos to see if this vehicle came with the textured plastic cladding or not. Or if you’re wrapping a Dodge Caravan, you can quickly see if this vehicle came with the three-inch side body moldings. And if you’re wrapping a utility vehicle like a police car or an HVAC truck, you can look for any aftermarket items you’ll have to work around – custom bumpers, lights, tool boxes, or something else that might affect your vital design areas, how the print should be tiled, and exactly what areas will be wrapped.
Our shop has a list of every vehicle type that we’ve ever wrapped – year, make, and model, including options, wheel base, bed length, cab type, trim, etc. We refer to these vehicles as “blue-certified.” These blue-certified vehicles have been completely surveyed in person by our staff. Measurements have been documented, used, and verified as 100-percent correct. These vehicles no longer require a survey, but they still require photos to ensure that they truly match a blue-certified vehicle.
If we come across a request for a vehicle that’s not on our blue-certified list (and this happens almost daily), we must get our hands on the vehicle. We prefer to have the client bring the vehicle to us so we can complete the survey with at least two staff members, indoors, and in a controlled environment. This allows us to use a good camera and have full access to all of our tools, plus enough room to take the ideal perspective photos. These photos include: straight-on from all sides, three-quarter shots from all four corners, a high shot of the hood and roof, and close-ups of any non-linear areas (such as fenders on a dually or air intakes on a Corvette).
After the photos are taken, we then require a few specific measurements on every vehicle. First and foremost is the wheelbase. Wheelbase measurements are great for three reasons: many template providers include them; vehicle manufacturers provide them online; and this measurement leaves no interpretation. It’s a very precise way to ensure you have a template that matches the client’s vehicle. Remember, template providers do a great job, but they’re not perfect. So trust – but verify.
Another great use for the wheelbase measurement is to help you scale your photos to 10 percent in Photoshop, enabling you to get the entire vehicle to scale. Once you have that measurement, you can measure even a door handle or other small or forgotten detail in Photoshop when the vehicle is no longer in your possession.
The hood is an additional area we take seriously when it comes to physical measurements. Correct hood measurements are not easy to get from template views alone, and many times they are very close to the maximum media width.
Advertisement
It’s also a good idea to get measurements of the entire length of front and back bumpers, the widest part of each door, the overall height of side panels, and the exact window measurements. These measurements, plus a good strategy on where to add bleed and how much bleed to add, will give your designer a fighting chance to get good mechanical production files to your print department.
Ensuring assets are viable
Following these strategies should allow you to provide your designer with a solid foundation to get the shape, size, and scale determined with a good level of confidence. But, we still owe the designer two more items: the usable assets and design direction.
Pay special attention to the word “usable” here. Providing your designer with the customer’s logo embedded in a Word document does not exactly make it usable. It’s vital that your frontline sales staff understands enough about art files to effectively communicate what works – and what doesn’t.
At bluemedia, we like to keep it simple: Vector artwork needs to be supplied as an INDD, AI, EPS, or PDF file. Raster artwork and all photography must be supplied at no less than 72 dpi at 100 percent, preferably as a CMYK TIFF. We explain how JPG files can add some noise and how RGB files will work – but will change color values when we convert them to CMYK. We further explain why we need their font or what it means to outline a font. These types of discussions with clients are very easy if you have a sales staff trained in these matters.
Have you ever given your sales staff a quiz on the subject of file-submission guidelines? Or trained your staff on how to discuss this topic with uninformed clients? You might find that your sales staff is either communicating different information to clients or, worse, wrong information to clients. Take the necessary time to get the right information to your sales staff, find a way to ensure they completely understand it, and then do spot checks to ensure everyone is on the same page. During this process, you’ll likely discover something new that your sales staff should know. Finally, have a process to roll out this new information.
Once you’re at a point where you can effectively deliver the dimensions of the vehicle and good client-provided assets that are truly usable, it’s now time to turn your attention to the creative content.
Do you have a formal process to take your customers through, one that documents factors such as:
* What’s the desired result of this wrap?
* Is this wrap part of a bigger campaign?
* How will this vehicle be used, who is driving it, and where does it go?
* Who is the customer’s competition, and what is their differentiator?
* How can we tell if the wrap “works” or not?
If you can’t gather this information correctly, you probably can’t deliver it correctly. I recommend you sit down with your design team and establish a process or at least a form document that will capture all vital and non-vital design intent. Then, huddle with your sales team to get it implemented.
After you’ve established the process for gathering this defined information, you must then devise a way to deliver it to your design staff. How will you get this information to the design team? It should be in the same manner each time, whether that’s in the job jacket, the design notes tab of your job-flow software, or simply via e-mail with a rigid subject line that follows a predetermined naming convention. This process should be predictable, repeatable, and capable of being archived and retrieved when needed later (even years later).
Championing the designer
So in the spirit of “make it your fault,” I suggest you take a hard look at what you could have done better before simply pointing a finger at your design department. Empower your design team to “reject” jobs that were incorrectly submitted. If they don’t receive photos for a vehicle that’s not “certified,” tell them to refuse to begin the design. If they don’t get information on the “exact” year, make, and model, tell them to politely ask the salesperson to get his or her act together and come back when details like that are indeed available.
The designer’s role is not only difficult and thankless, but they’re often at high risk for being the fall guy when something doesn’t fit. Before simply asking the design team how they could have “made such an obvious mistake,” remove every possibility that the process, policies, protocol, or the lack of provided detail could contribute to leaving the door open for errors. Give your designers a break – they work hard and we could all use a little exercise in tuning up the provided information and how it gets to them. Happy designers can really help ensure happy customers.


 Press Releases2 months ago
 Press Releases1 month ago
 Press Releases1 month ago
 Press Releases2 months ago